


Installing a sensor light outdoors is one of the easiest ways to improve safety around your home. A motion sensor light helps brighten dark areas, guide you at night, and discourage potential intruders by switching on as soon as it detects movement. While these lights can look easy to install, the process still requires correct placement, safe wiring, and proper setup to ensure they work as intended.
Before you begin, it helps to understand how motion sensor lights operate, what to prepare for, and why professional installation is the safest choice.
What Is a Motion Sensor Light
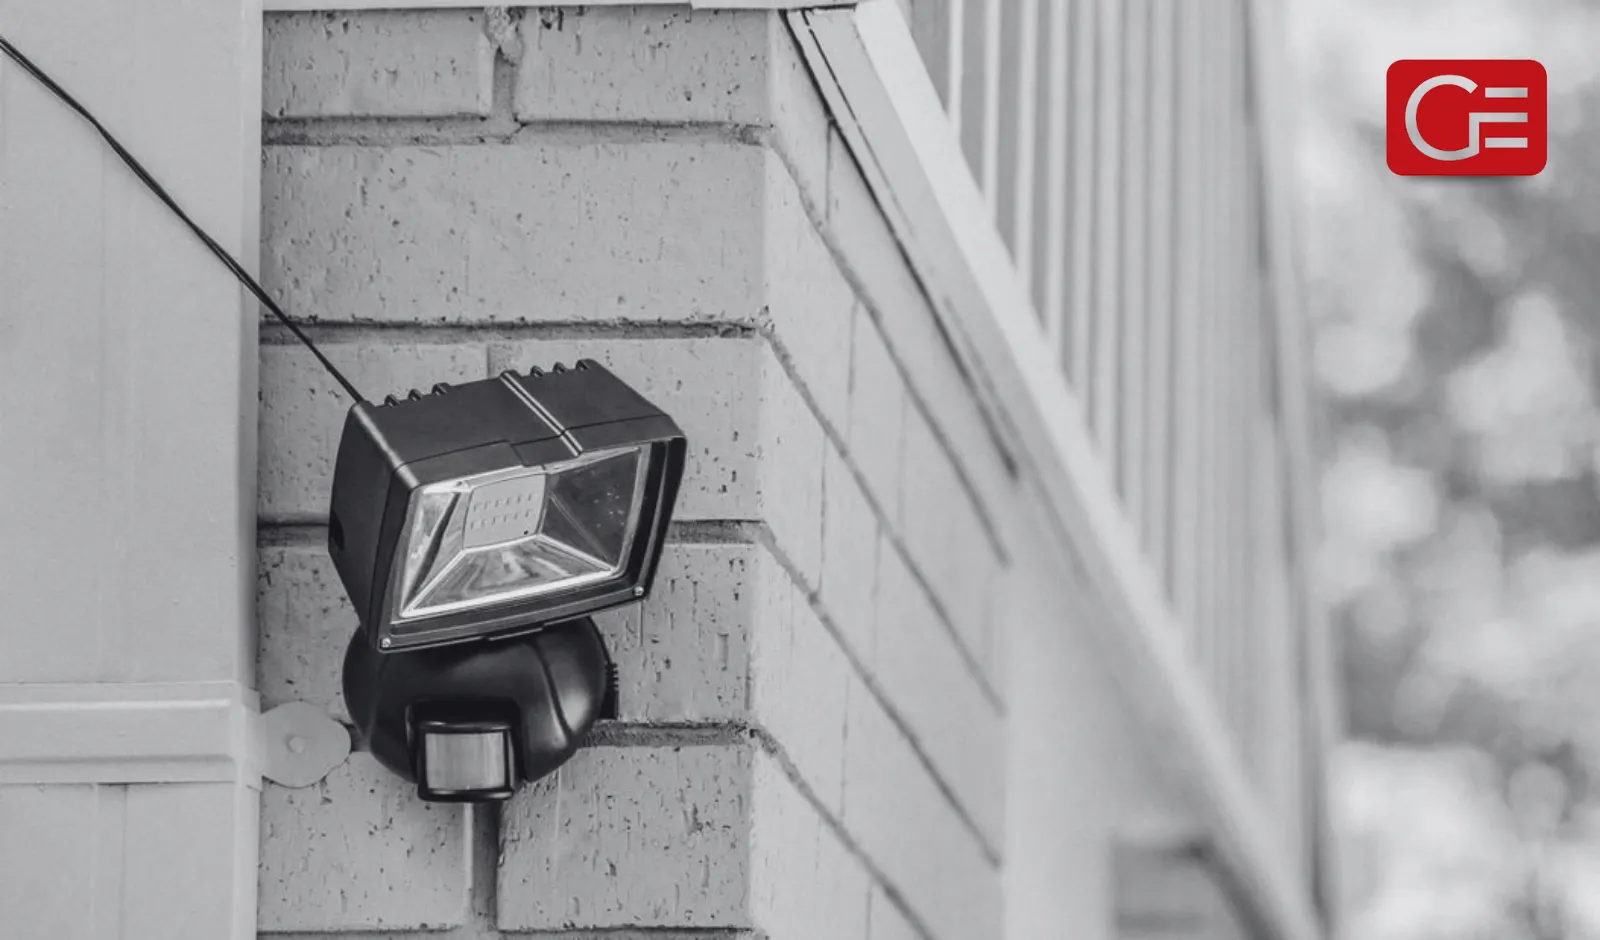
A motion sensor light is an outdoor lighting fixture designed to detect movement and turn on automatically when someone approaches. These lights are commonly placed near driveways, pathways, garage doors, and entrances to improve visibility and boost home security.
Modern lighting fixtures include:
- A sensor to detect movements
- A lamp that switches on instantly
- A weather-protected body
- Adjustable sensitivity settings
- Mounting points for secure installation
They are simple in concept but still require proper handling during installation to ensure safety and performance.
Where Motion Sensor Lights Work Best
Before installing a sensor light outdoors, consider the areas that benefit most from motion activation. Popular locations include:
- Front and back entrances
- Driveways and garages
- Pathways and steps
- Side yards and dark corners
- Spots where potential intruders may approach
Correct placement helps your motion sensor light detect movements across the most important parts of your property.
What to Check Before Installing Outdoor Lighting
Even though these lights may seem easy to install, preparation plays a big role in how they perform. Here are a few things to consider before installation:
1. Read the manufacturer’s instructions
Every model has different requirements for wiring, mounting, and sensor range.
2. Choose the right height for mounting the lights
This helps the sensor detect movements accurately without false triggers.
3. Make sure the power source is appropriate
Outdoor lighting must be installed safely, especially when connecting to existing wiring.
4. Look for obstacles
Plants, walls, or posts may limit detection zones.
Preparing ahead makes the installation process smoother and more effective, and a 24-hour emergency electrician can help if you run into issues you were not expecting.
Why Installing a Sensor Light Outdoor Requires Professional Help
Many homeowners search online for how to install motion sensor lights outdoors or think they can simply remove the existing fixture and replace it. In reality, outdoor lighting often involves working with electrical wiring, weatherproof seals, and safety protocols.
Here’s why a registered electrician should handle the job:
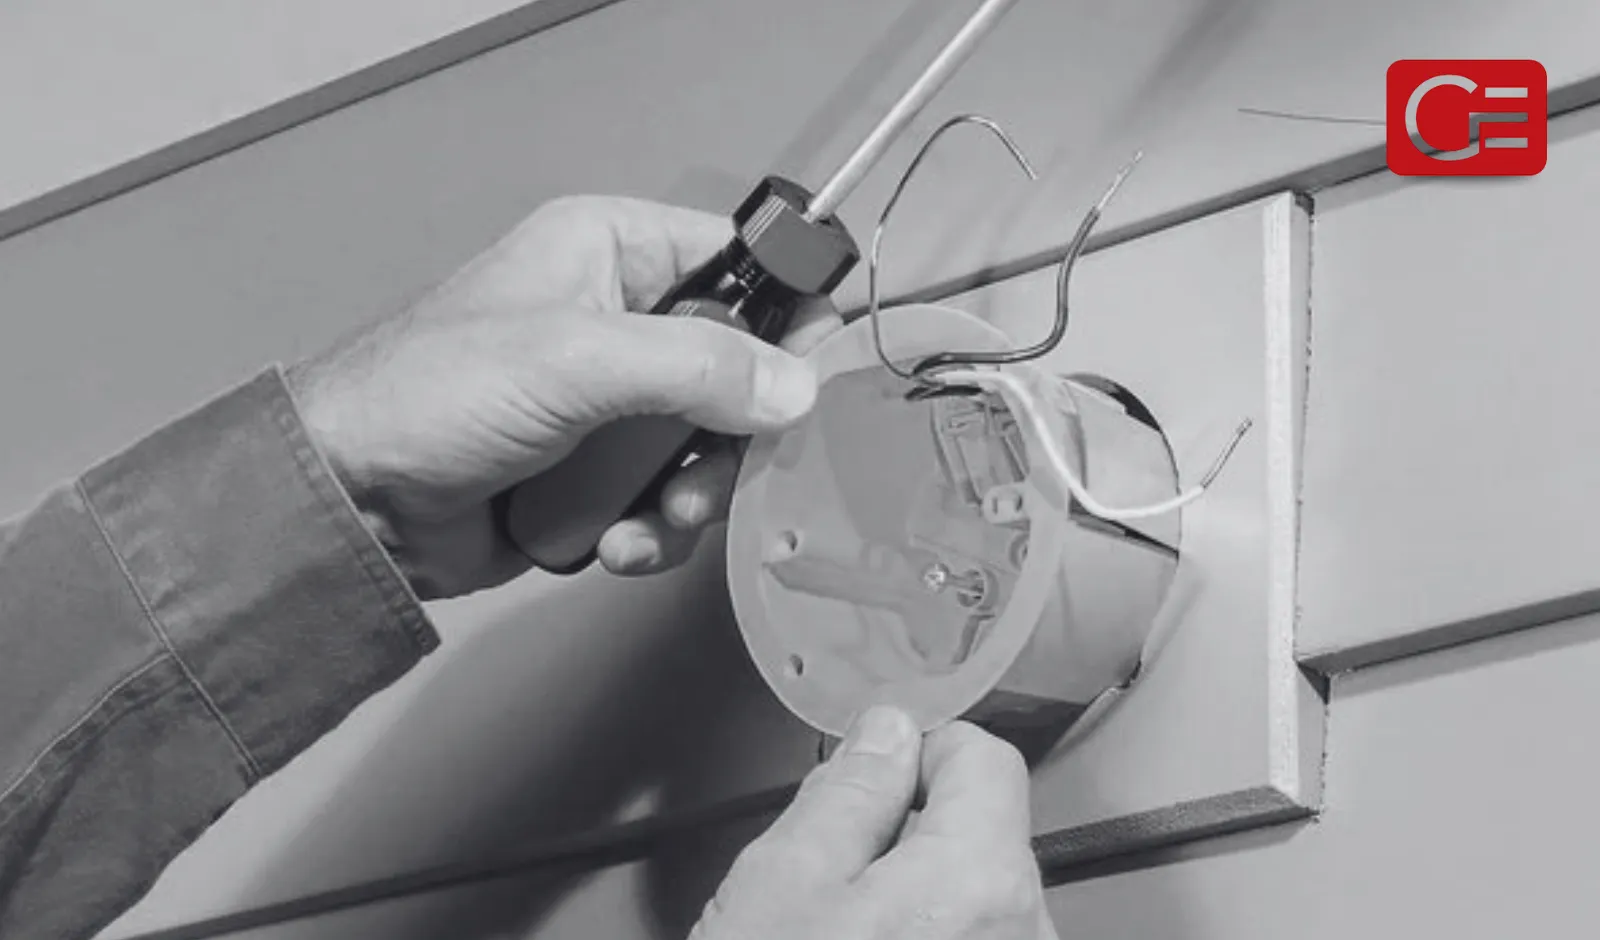
- Safe wiring: Connecting or replacing lighting fixtures requires specialised knowledge. Incorrect wiring can lead to shocks or damage.
- Correct positioning: Proper mounting of the lights ensures the sensor detects movements where it matters most.
- Weather protection: Outdoor lighting must be sealed against moisture to prevent faults.
- Proper calibration: Professionals adjust sensitivity settings so the light responds correctly without constant false triggers.
- Final testing: An electrician will test the lights to confirm they activate at the right time and stay reliable over time.
Even simple mistakes can affect performance or create safety risks, which is why professional support matters.
How a Licensed Electrician Installs Motion Sensor Lights
Here is an overview of what a professional does during outdoor lighting installation.
1. Assess the area
They determine the best position for the sensor to detect movements effectively.
2. Turn off the power safely
The electrician isolates the circuit before any work begins.
3. Remove the existing light
If upgrading an outdoor fixture, they safely remove the existing fitting and prepare the mounting point.
4. Install the new lighting fixtures
This includes mounting the lights securely and ensuring they sit flat against the surface.
5. Connect the wiring
All joins are completed using approved methods that follow New Zealand electrical standards.
6. Adjust settings and test the lights
The electrician configures the timer, brightness, and sensitivity settings, then walks through the detection area to test the lights.
7. Final safety check
They ensure the fixture is sealed and secure for long-term outdoor use.
This professional installation helps you avoid wiring risks and ensures your motion sensor light performs reliably.

Maintaining Your Outdoor Motion Sensor Light
Once installed, motion sensor lights require only occasional checks to keep them in good shape.
Helpful maintenance tips include:
- Wiping the sensor lens to remove dust
- Checking that mounting the lights remains secure
- Inspecting wiring covers to ensure they stay weather-tight
- Making sure the sensor still detects movements in key areas
- Updating timer or brightness settings if needed
A little care helps your outdoor lighting stay bright and responsive.
Your Trusted Auckland Team for Outdoor Lighting
Installing outdoor lighting, especially motion sensor lights, is one of the best ways to make your home safer. Grammar Electrical provides safe and reliable lighting installation across Auckland, ensuring every fixture is wired correctly, positioned well, and tested for long-term performance.
For expert installation that keeps your home protected and well lit, trust the team Auckland homeowners rely on. Call us today on 09 884 6611 or book online to save $15.
Auckland’s Trusted Electricians
Fast, reliable electrical repairs, installations & upgrades - available 24/7.
Book Online & Save $15


.webp)

Got a question?
Contact us for a FREE installation quote or book your job online today.
Same Day Service Guarantee - Terms & Conditions

The "Same Day Service Guarantee or it's Free" applies to:
a. Residential work and Commercial only.
b. Jobs specified as needing same day service when booking a job by phone or online.
c. Residential and Commercial work booked with Grammar Electrical:
i) Before 11:00AM
ii) For calls or online bookings received after 11:00AM, the customer will be offered a job. Booking for the next business day and normal callout fees ($170+ GST) will apply.
iii) Any other jobs booked outside business hours (9:00AM - 5:00PM Monday- Friday) will incur after hours charges.
iv) This offer is excluded for jobs booked on New Zealand public holidays.
d. If Grammar Electrical are unable to attend on the same day (within 24 hours) for a job booked by the customer, the standard callout fee of $170 + GST will be waived and is free, but all other normal charges, fees and expenses will apply to perform the Electrical Services and to provide any products/materials concerning those services.
e. The Standard Callout Fee will be deducted from your bill as long as you pay within your invoice's due date. The callout charge is applicable if your invoice is overdue.
f. If Grammar Electrical are willing and able to perform the Service or provide the Goods on the same day the job is booked, however the Customer for whatever reason does not give access to their property on the day, Grammar Electrical will be deemed to have complied with it's "Same Day or it's Free" guarantee and shall be entitled to charge the customer the standard call-out fee.
g. This offer is not a guarantee of work being completed. The completion of the job will depend on stock availability and also the amount of work required.